When adding content to NetSocial, you have two options:
1. Add the post directly and select which of your company's social media accounts you want that content to post to.
2. Add the content to a channel.
Following are the benefits of adding content to a channel:
- It saves clicks! After you subscribe your company social media accounts to a channel, you don't need to select them each time you create a post.
- By adding content to a channel, your team members can subscribe to your channels, and the content you post to a channel will automatically post to the team member's social media.
Note: There is a setting the team members can set that allows them to approve content posting from a channel they are subscribed to before it posts to their personal social media.
Before you can post content to channels, you must do the following
- Add channel Categories
- Create your channels.
Instructions for creating channel categories can be found here
Instructions for creating channels can be found in this short training video or the NetSocial Quickstart guide.
How To Add Content To A Channel
1. Log into NetSocial and change your view from "Viewing As Myself" to viewing as the company.

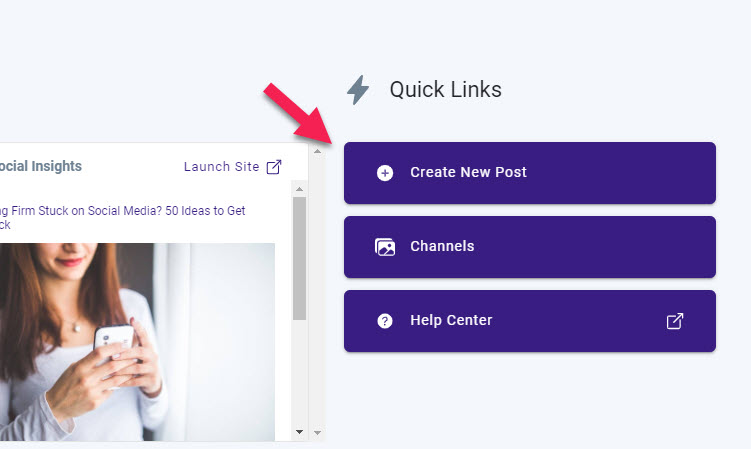
2. In the Quick Links section on the right-hand side, select "Create New Post."
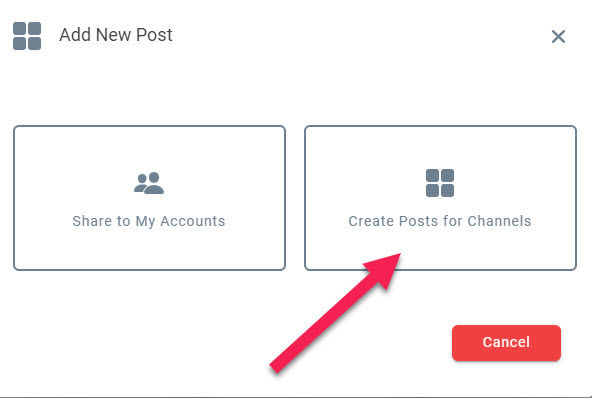
3. Select "Create Posts for Channels
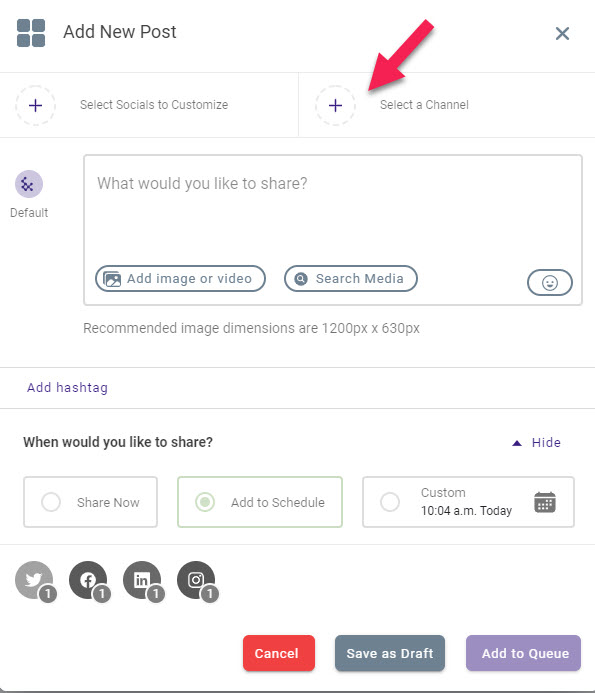
4. Click the + to Select a Channel
5. Select the channel(s) you would like to add the content to. You may select more than one channel but keep in mind if team members or your company accounts are subscribed to more than one channel, the content will be posted multiple times.
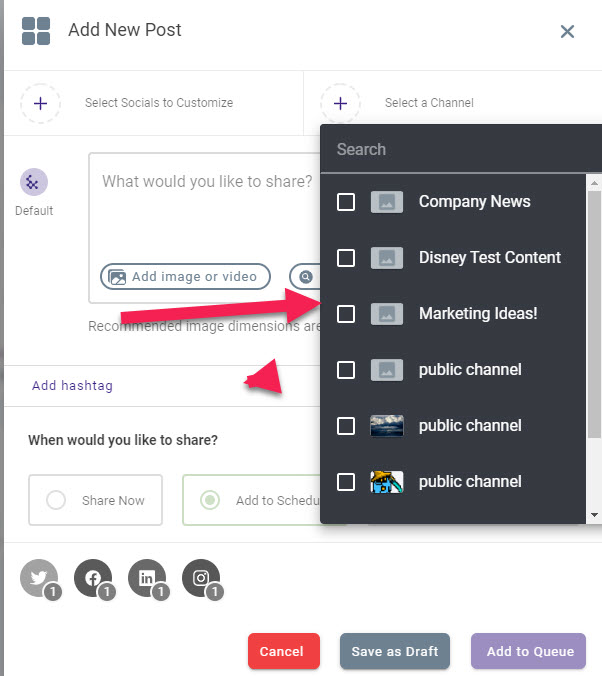
6. After you have selected your channels, click anywhere outside the channel selection box.
7. Add your content into the "What would you like to share" box. Include hashtags at the bottom of our content. Hashtag suggestions will display based on the content of your post, or you can add your own. To include one of the suggested hashtags, simply click on it.
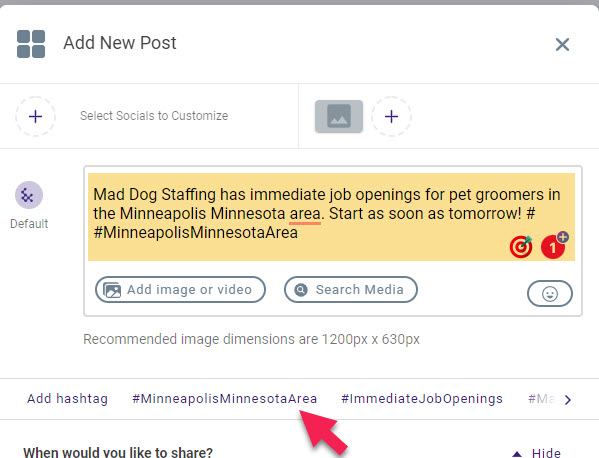
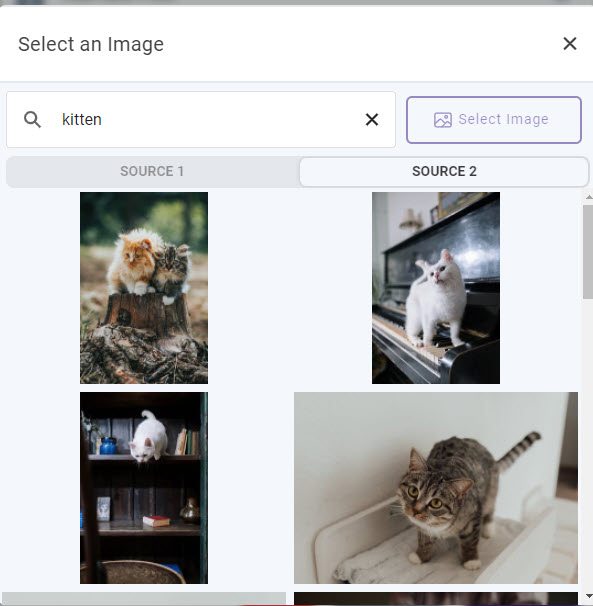
8. Add an image or video to your post. If you click "Add Image or video" you will be able to browse your network folders for a saved file. If you click "Search Media" you can search a media library.
9. In the "When would you like to share?" section you have three options
- Share Now - which will post the content immediately. Selecting this option will override your posting schedule. Information on posting schedules can be found HERE
- Add to Schedule - which will schedule the content to your NetSocial schedule based on your posting schedule.
- Custom - allows you to select a specific date and time for the content to post. Selecting this option will override your posting schedule.
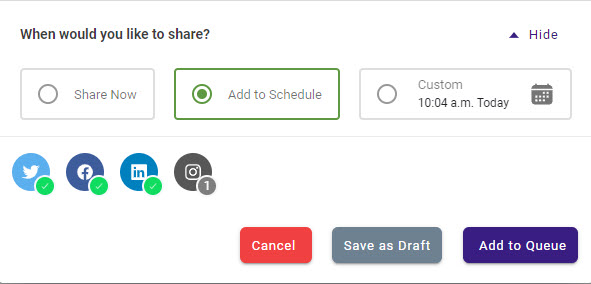
10. Click Add to Que
Bonus Feature!
When adding content to a channel, you have the option of customizing that content for specific social media platforms. For example, if you want a different image or hashtags for the post when it goes to LinkedIn, you can easily do this when adding the post to the channel.
How to customize a post for a specific social media platform
You have the ability to customize a post for a specific social medial platform. An example use case for this feature is Twitter has a character limit, and Instagram does not accept hyperlinks. Don't worry, NetSocial accommodates this!
1. After you have added your post content, hashtags, and image, but before you select "Add to Queue" Click the + in the "Select Socials to Customize" box

2. Select the social media platform you would like to customize this post for, then click anywhere outside the shaded selection box.
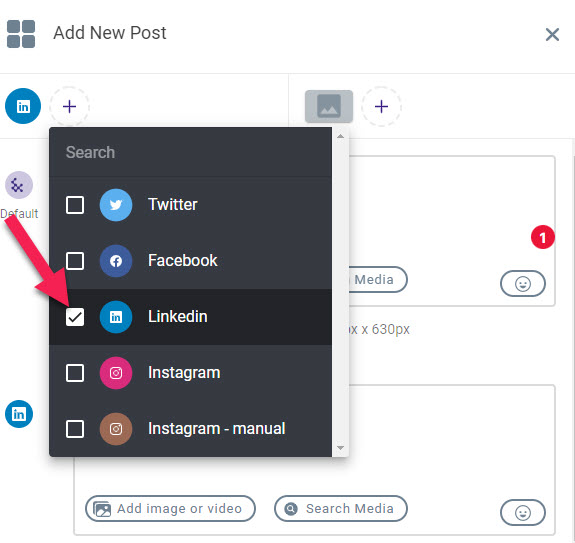
3. A content box specific to the social media platform(s) you selected will display.
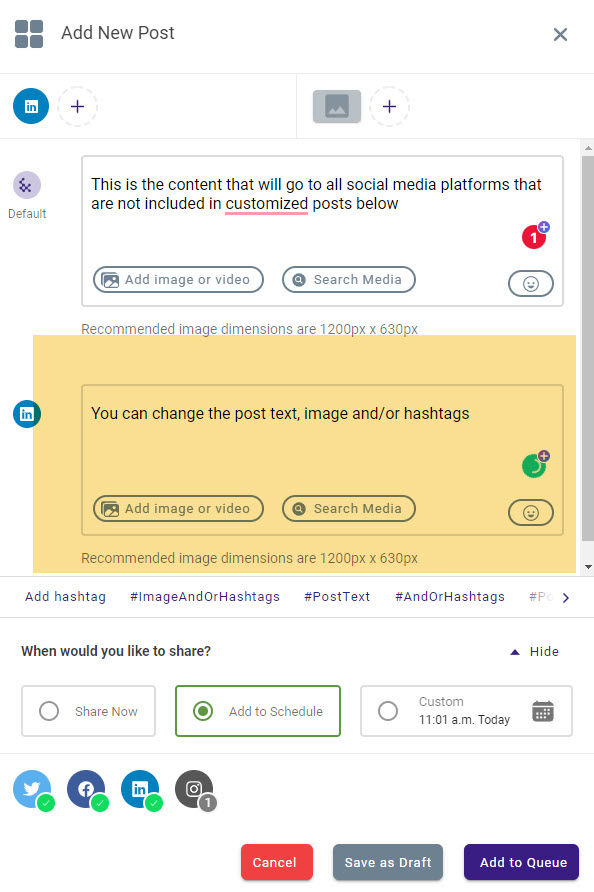
4. Follow steps 7-10 in the "How to Add Content to a Channel" section above.
Any questions please contact our Client Success team at success@haleymarketing.com
Comments
0 comments
Please sign in to leave a comment.