Before you can set up a Channel, you will need to add Channel Categories. At a minimum, you will need one Channel Category.
Channel Categories are useful for organizing your channels and grouping similar channels together. An example of channel categories might be:
1. Company News
2. Candidates
3. Clients
In the example above, you might have the following channels associated with each of these categories.
| Company News | Candidates | Clients |
| Staff Birthdays | Open Jobs | Available Candidate Spotlight |
| Staff Anniversaries | Candidate Focused Blogs | Client Focused Blogs |
| Company Events | Upcoming Job Fairs |
How to add a channel
1. From the NetSocial dashboard, change your view from "Viewing as Myself" to the company view.

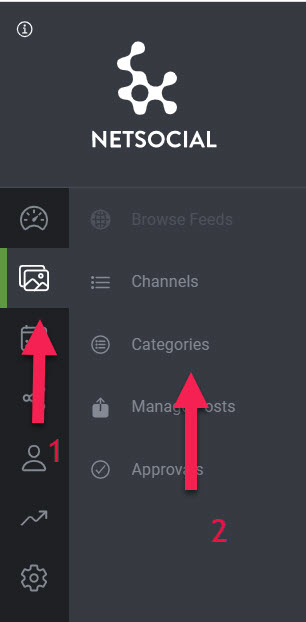
2. In the left side menu, click on the Content icon and then Categories

3. Click the Add Category button

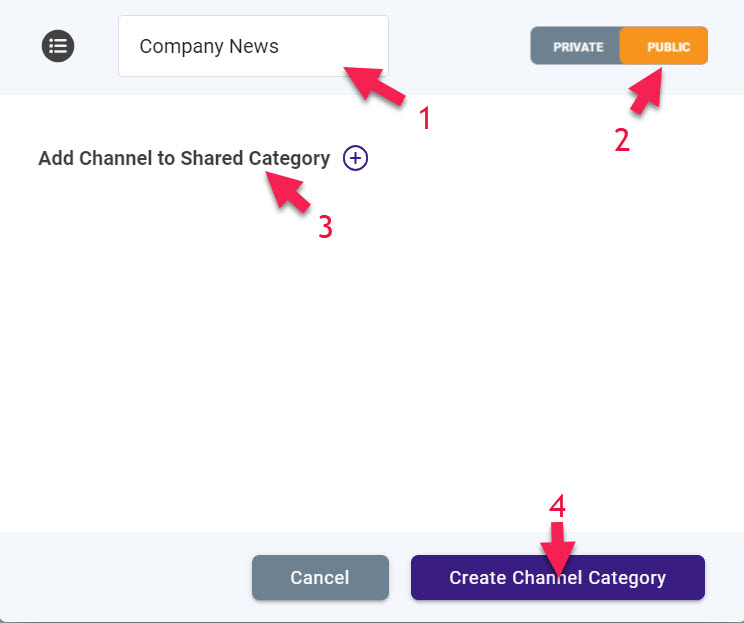
4. Enter in the name of your Category. Next, select if you want the category private or public. If you will be adding channels to this category that you want team members to be able to subscribe to, you will want to set the category as Public.
Next, you can add existing channels to this category. Generally, categories are set up first and then associated with the channel when it is created. Adding the channel while creating the category is useful when reorganizing your channels.
Then click "Create Channel Category."

After you have created your Channel Categories, your channels will be grouped by the category they are in making it easier to find a category you are looking for.
For information on creating channels click HERE
Still have questions? Contact our Client Success Team is here to help!
Comments
0 comments
Article is closed for comments.