
After Haley Marketing has set up your VideoNOW account, there is one final setup step that each User will need to do. This last step will decrease the chances of the VideoNOW emails going into the recipients' spam or junk mail folders. The following instructions will walk you through configuring the SMTP email settings for each User.
Haley Marketing is unable to do this final setup step on your behalf as it requires knowledge of the User's email password (and we don't want to know that!)
- Log into your VideoNOW account.
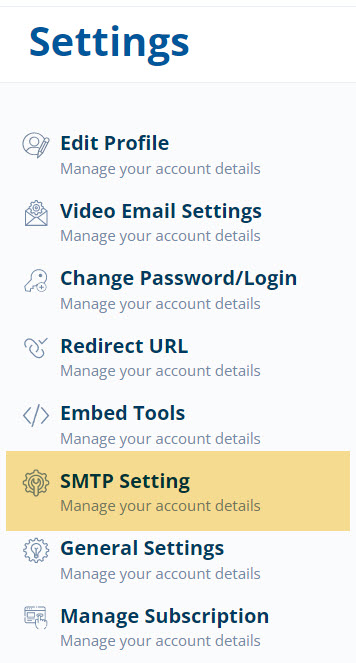
- Click on the "Manage Your Profile" tile in the lower right.
- Click on "SMTP Setting" in the left-hand menu.
- Enter the User's email address and password. The password entered should be the password used to log into email, NOT the VideoNOW password.

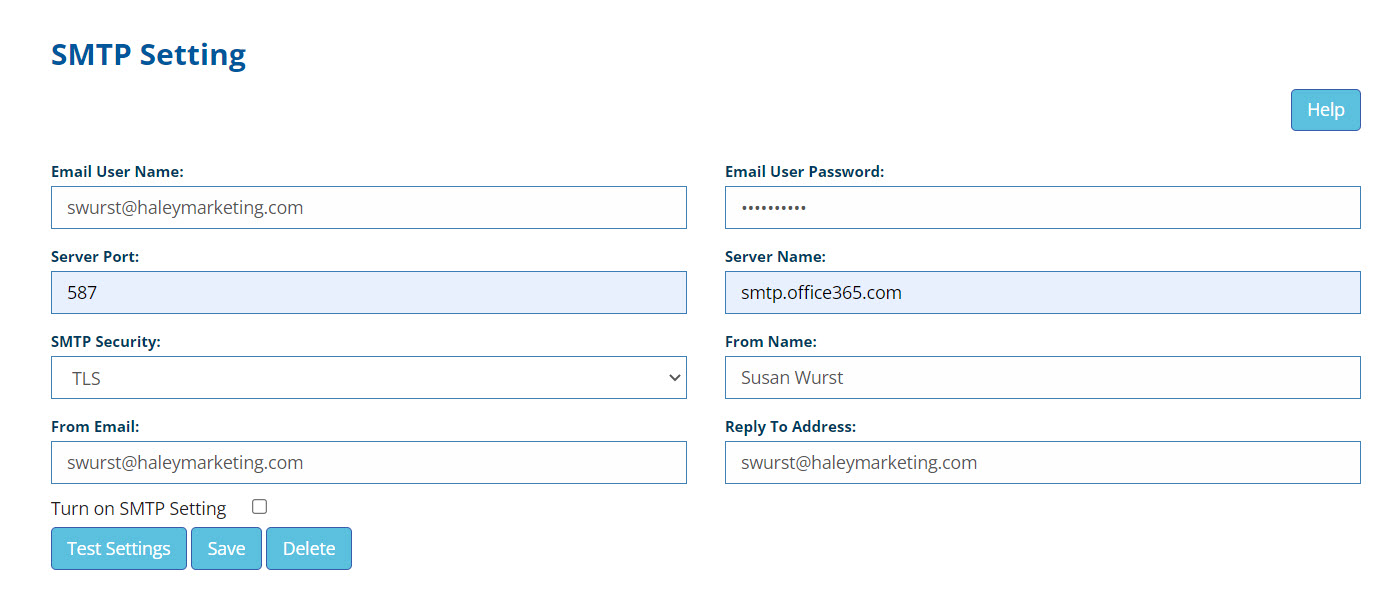
- Enter the Server Port, Server Name and select the correct SMTP Security option.
Office 365
If your email is Outlook through Office 365, the following is what you will want to enter:

If your account is protected by Multi-Factor Authentication, you must enter your APPLICATION PASSWORD, as opposed to your Microsoft Office 365 password. If you don't have an app password, you can generate one here.
Outlook
If your email is Outlook NOT through Office 365, the following is what you will want to enter:

Gmail
If your email is a Gmail account, please see the instructions at the end of this article.
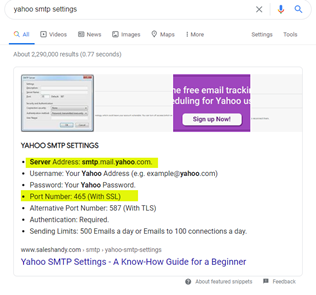
All Other Email Providers
You can easily find this information by Googling "SMTP settings for INSERT YOUR EMAIL PROVIDER NAME" Below is an example of the Google search for Yahoo SMTP settings and the information that you will receive as it pertains to this setup.
- Next, enter the From Name, From Email Address, and Reply to Address. The information you enter here will determine what the recipient will see when receiving the email and who the replies will be sent to.
This information does NOT need to match the Users email address.
- Next click the Test Settings Button

- You should get a "Successfully Connected" message. If you received an error, check your settings,
make any necessary changes, then click the Test Settings button again. - After you receive the "Successfully Connected" message, check the box next to "Turn on SMTP
Setting" - Click the Save button

GMail SMTP Settings
STEP #1 – Enabling 2-Step Verification
You need to make sure that your Google account is well protected to avoid any intervention when using the SMTP service; therefore, we recommend enabling the 2-step verification offered by Google.
1. Log in to your Google account with your login credentials.
2. Select Security from the left navigation bar.
3. Now, click 2-Step Verification option from the given choices and complete the further setup.
STEP #2 – Generate App Password
Now, you need to generate an App Password that will be used for the SMTP integration
1. Select Security.
2. Under "Signing in to Google," select App Passwords.
3. Follow the instructions to enter the App Password.
STEP #3 – Configuring SMTP Service
EMAIL USER NAME: Enter your Gmail account’s email
EMAIL USER PASSWORD: Enter your App password
SERVER PORT: Enter 465 or 587
SERVER NAME: Enter smtp.gmail.com as your host
SMTP SECURITY: Enter SSL (for port 465) or TLS (for port 587)
For G-Suite Users
Follow the above instructions, and use your regular Gmail password and login, just turn on Less Secure Apps
Comments
0 comments
Please sign in to leave a comment.