
Once you've added your team members to the Team Members section in MyHaley, you can now set up your team page in WordPress!
Log into WordPress, and look for the Team Profiles section on the lefthand menu. This is how you know the plugin is active and ready to go on your site.
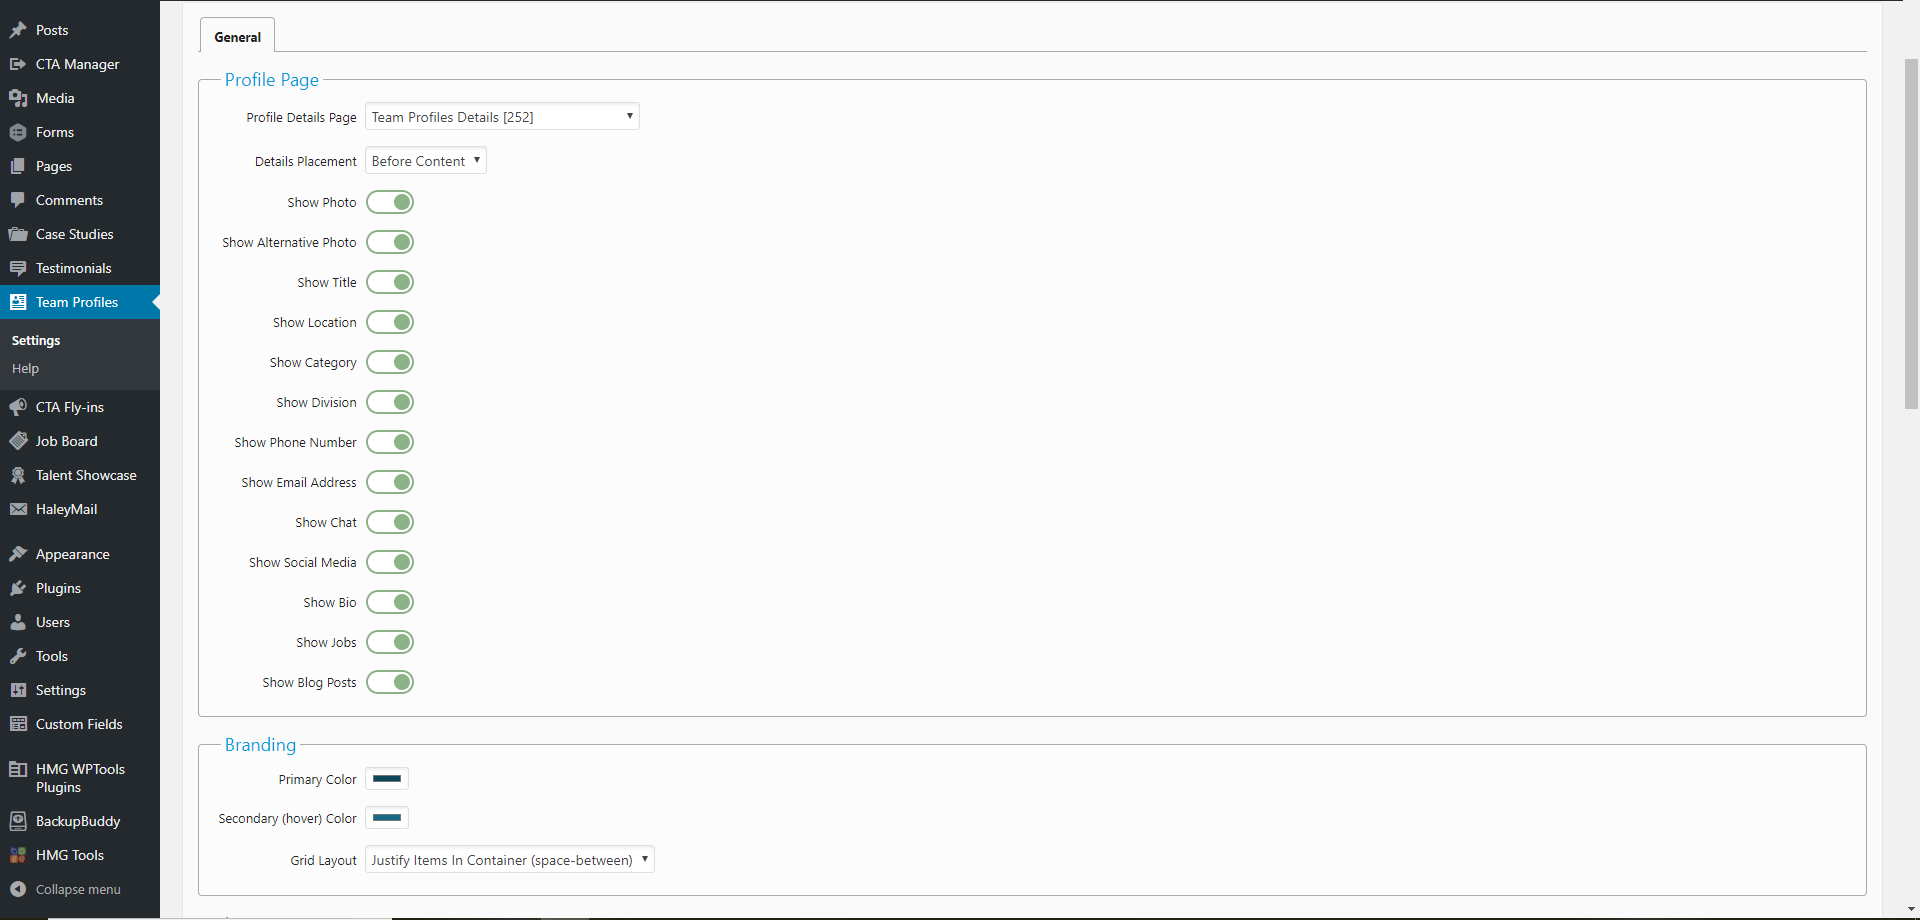

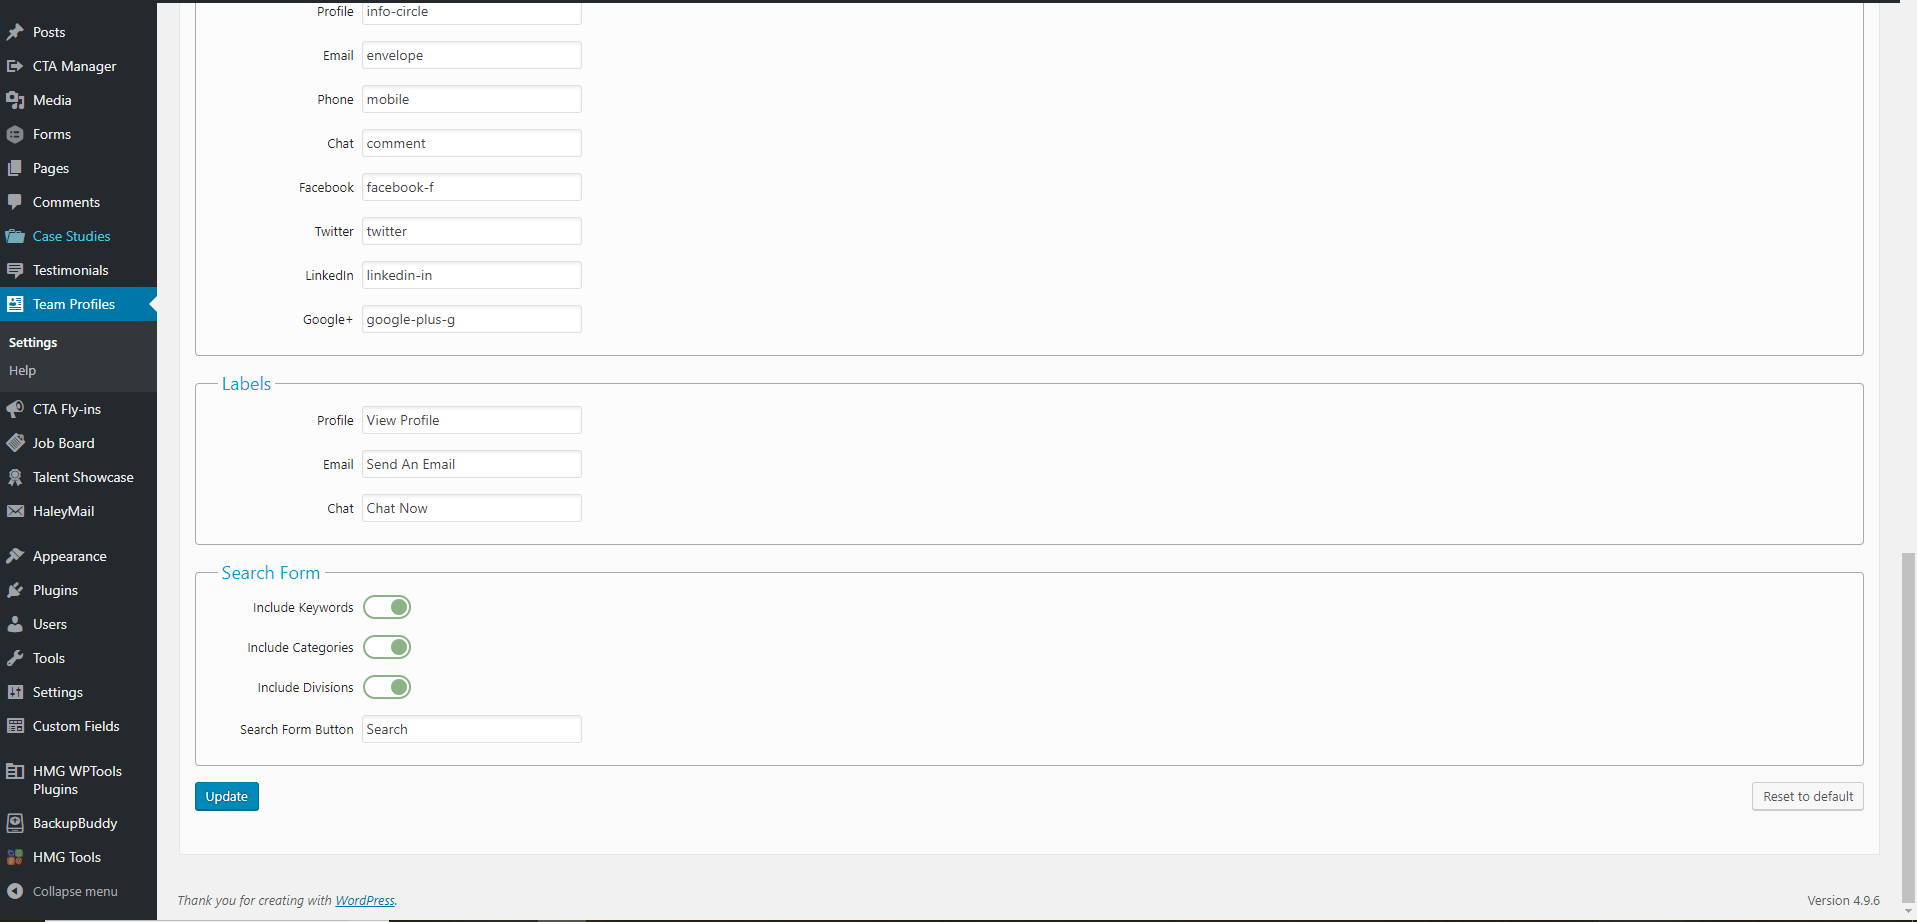
This is where you can choose what will display on the team page (Profile Page), if you want an alter ego image or just a regular headshot to display (Images), what the CTA buttons will say (Labels), and what to include on the page (Search Forms). Keep in mind, you can also adjust these settings when you are entering the bios into your team page.
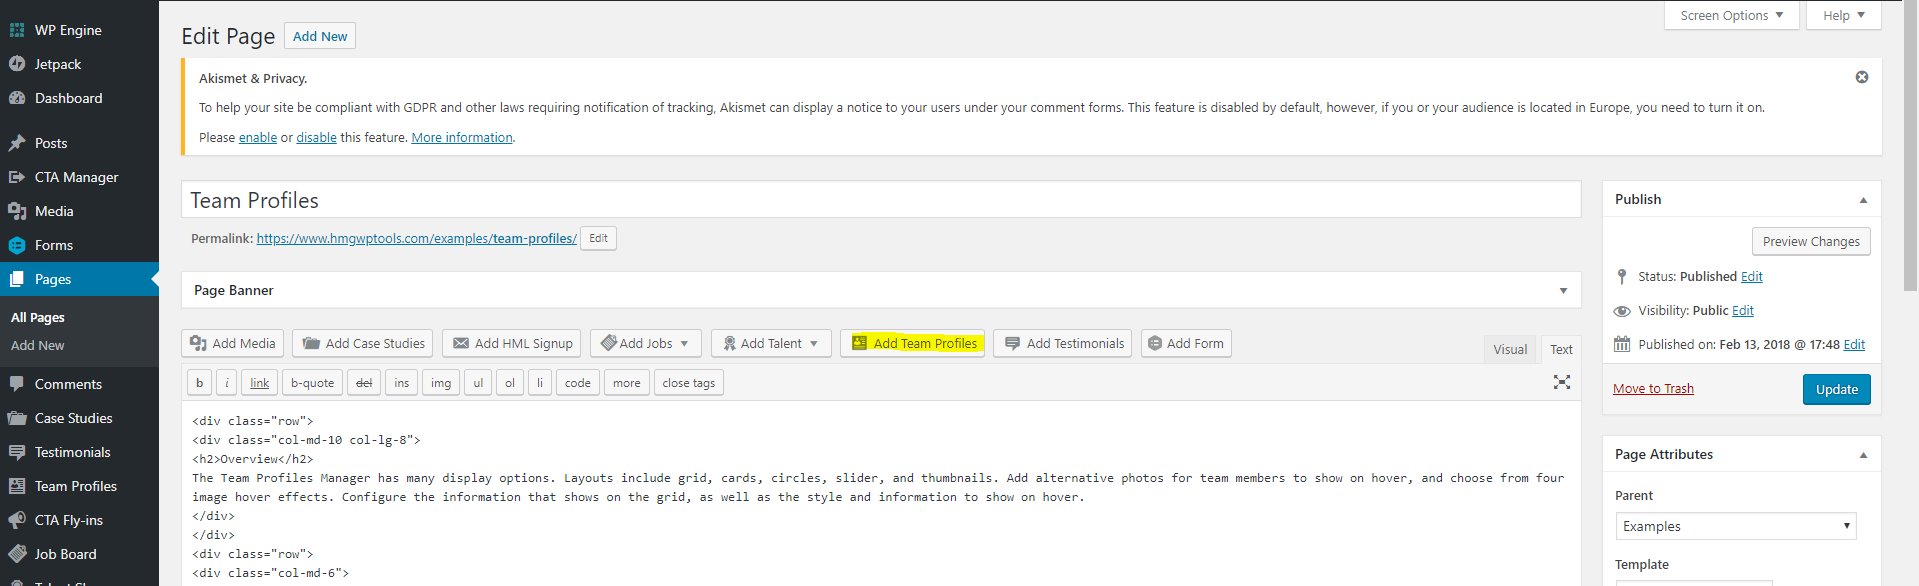
To add these bios to a page, go to Pages>Add New, and create the team page in the appropriate section.
The profiles will be coded to the page via a shortcode that our team has already pre-built. You just need to click the Add Team Profiles Button:
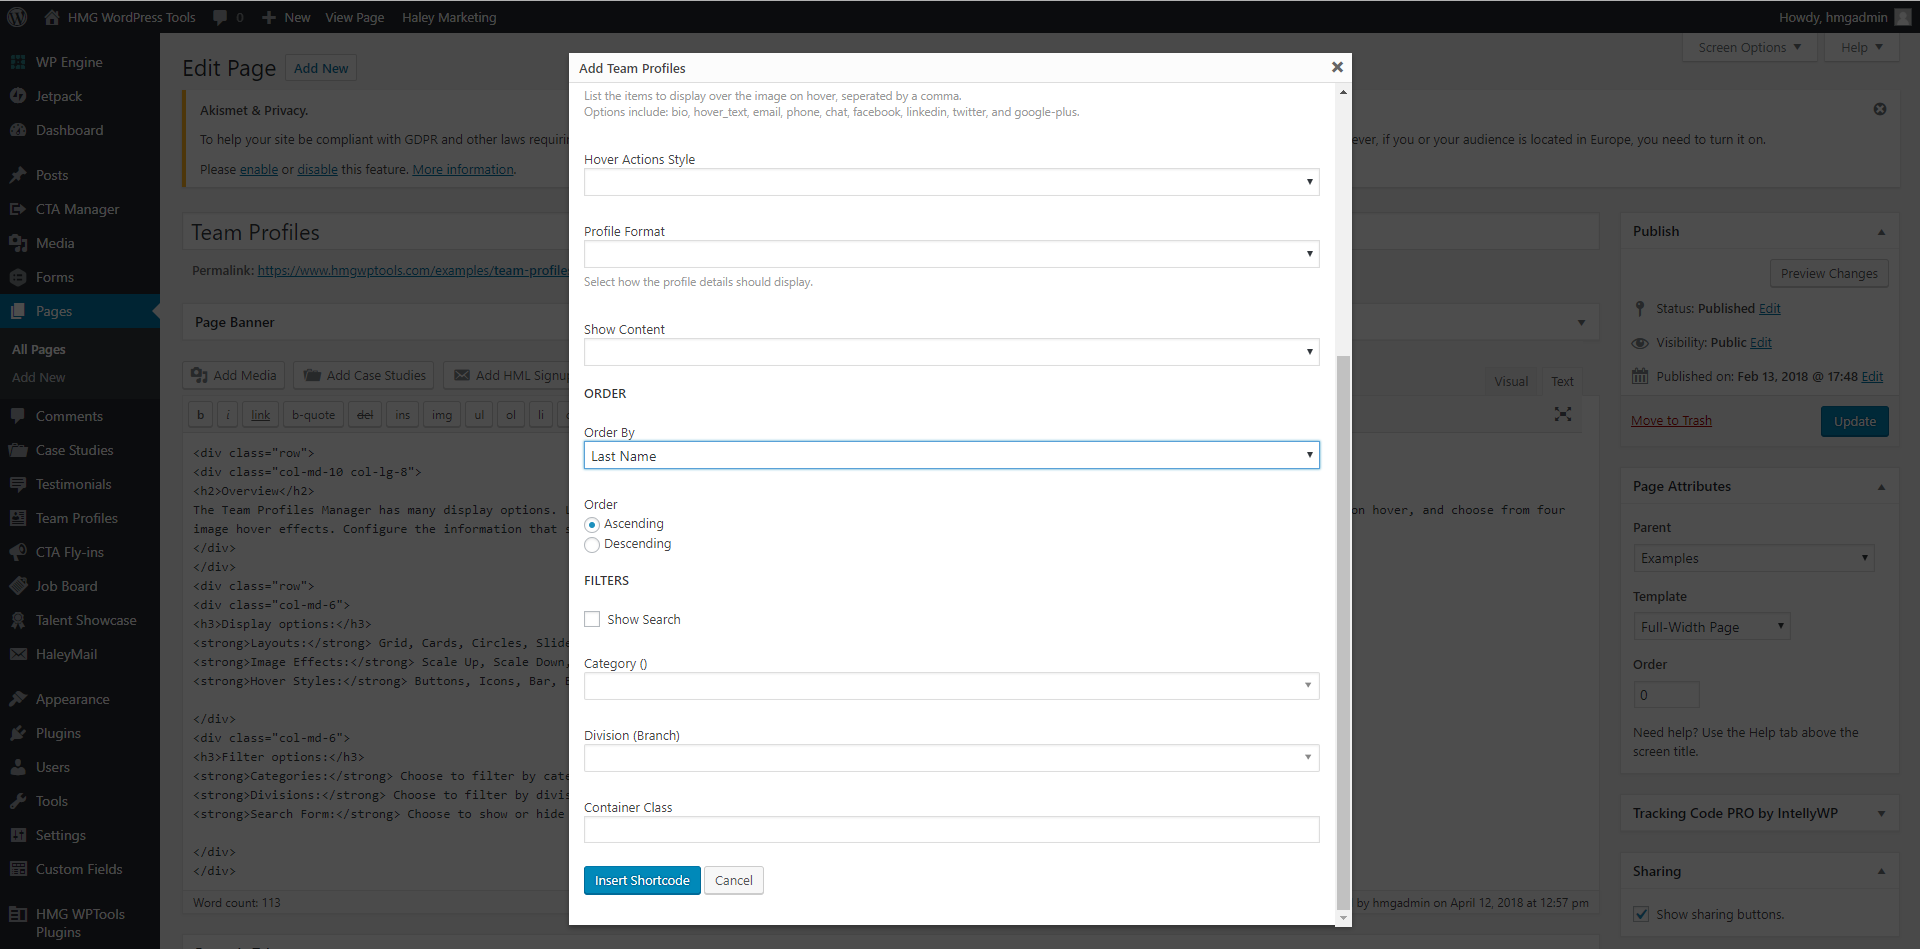
You will then be prompted with a window where you can also configure the settings:
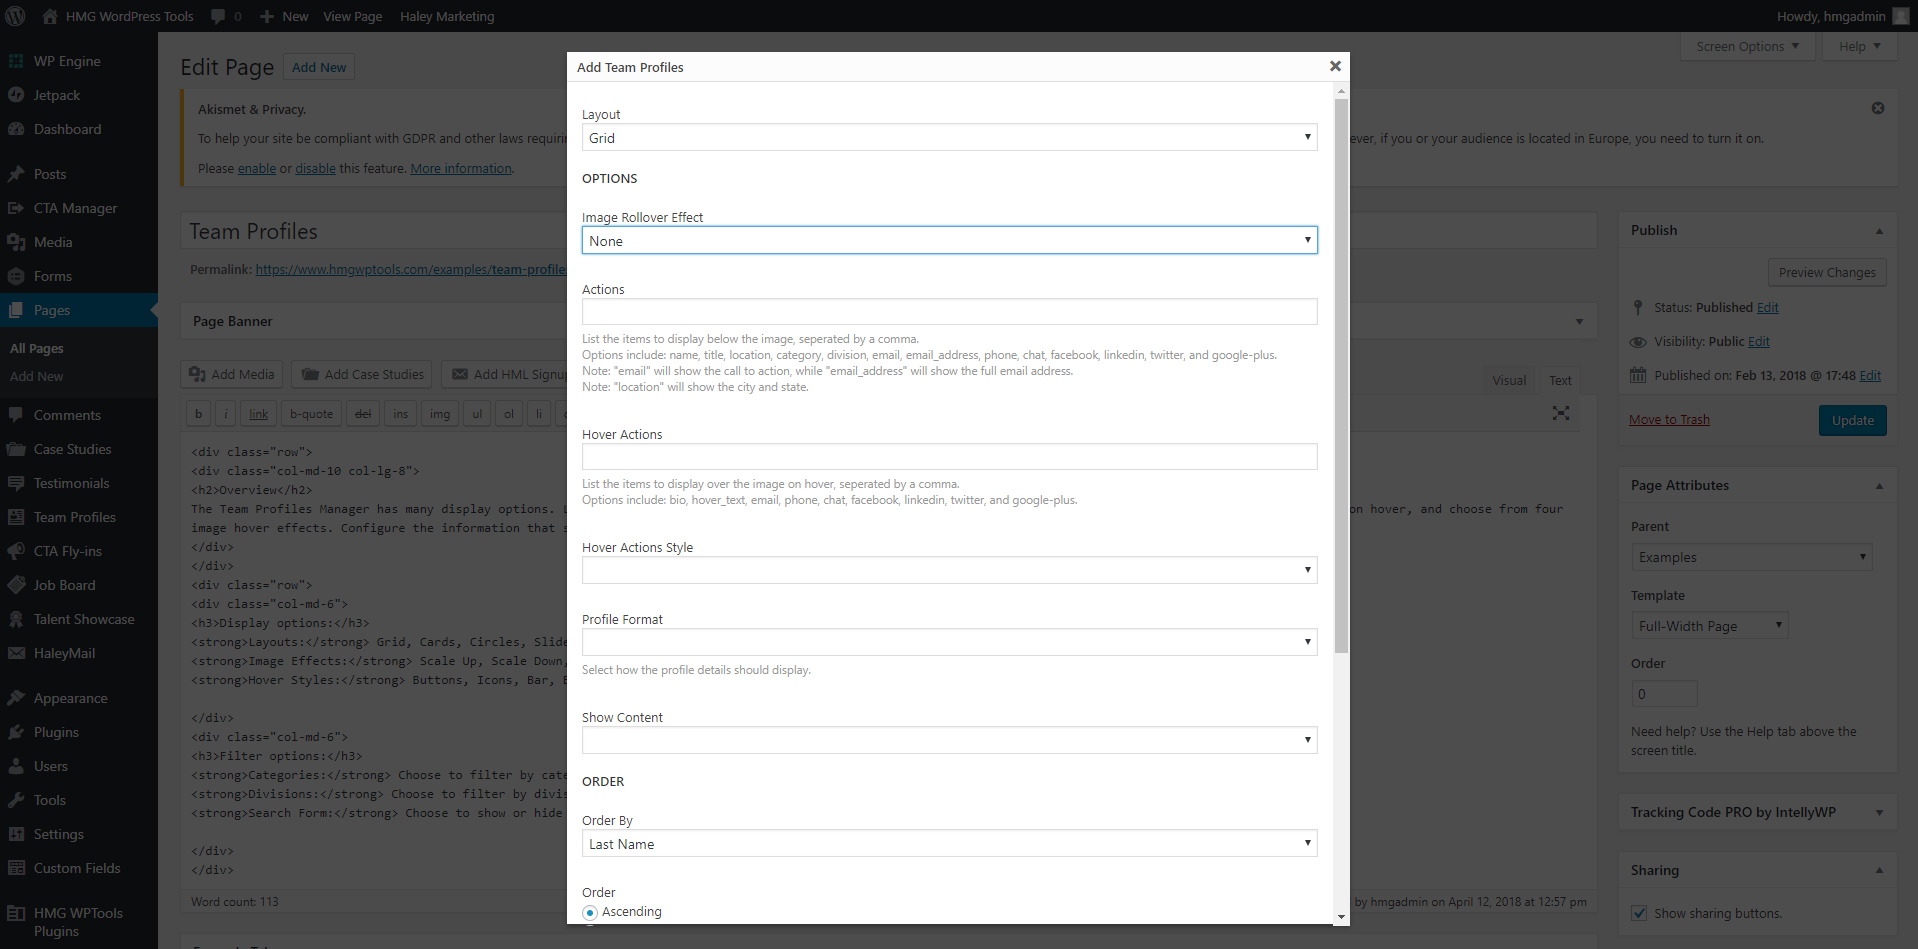
Here you can decide the layout of the profiles, the effect when you hover over the headshot with your cursor, if the profile will open in a new window or open in a modal window, how much content will display - an excerpt or the whole bio upon hover - and, if the profiles are sorted by Last Name, First Name, Order, or ID.
Once you're happy with the settings, you can click the blue button that says Insert Shortcode, and everything will be added to the page, ready to go!
For further assistance, please reach out to our Client Success team, success@haleymarketing.com, or go to HelpMeHaley and open a ticket!
Comments
0 comments
Please sign in to leave a comment.